
If you are ready to take it to the next level in your backpacking goals, then it’s time to consider the Wonderland Trail. The exact mileage of this adventure has always been up for debate. Although that’s mostly due to all the variations you can make. I highly recommend that you do a ton of research before taking on this adventure, because it is not for the light of heart.

Overview
Mileage: 93-98 miles
Elevation Gain: 22,000 ft- 25,341 ft
Time Required: 7-10 days
Permit: Lottery System via Recreation.gov
Parking Pass: American the Beautiful
Food System: Cache stations mailed in 2 weeks prior, or hand delivered whenever
Itinerary Planner: Wonderland Guides (interactive) and NPS.gov website (general aid with snow pact detail)
Trail Maps: AllTrails and FarOut. You will need an AllTrails membership (use drewadventures30 for 30% off)
Permits
You will need to first start by obtaining a permit through the advanced lottery system. This can be done through Recreation.gov. The exact deadlines will vary each year, so make sure you check the deadlines in advance. At this time, you will only need to know the number of people you wish to be in your group. If you win the lottery, you will be awarded a date and time slot at which you can book your specific itinerary. However, it should be noted that the later your time slot/date, the more flexible you will have to be with dates and camp site locations.
If you missed the deadline or didn’t receive a permit. Make sure to watch out for the general sale date, which is the release of unused permits that were available during the lottery. Also, there is a remaining 1/3 permits that are issues on-site at a first-come, first-serve basis. If you choose this, I recommend that you arrive before the crack of dawn on the day you wish to start, for best chances. It is rumored that people often cancel their permits last minute though, so chances of receiving a permit are high, as long as you are okay with little say in your itinerary.
Keep in mind when booking that a maximum party size is 5 people with 3 tents total. If you have a party between 6-12, you will need to camp at designated group campsites.
Building an Itinerary
This is one of the hardest parts about doing the Wonderland Trail. There are many things to consider when building an itinerary. This includes miles/elevation to hike a day, location of caches, campsites in reference to possible day hikes you want to do, and the opening hours of the available store near Sunrise camp (since you will want real food by then, not open Wednesday/Thursday).

When starting your planning, I would highly recommend using this interactive trip planner from Wonderland Guides. Here you can pick a start/end location, note they will be the same if you are doing the entire loop, and the number of days you wish to complete the hike in. From there it will map out a reasonable set of campsites that would allow you to finish the trail in the desired amount of time. This would be considered the more ideal itinerary in terms of miles per day. However, if you didn’t get one of the first time slots for booking, this would be where you would need to get flexible. If you have this open while you are booking, you can hit the change destination to closer or further camp site. Therefore, if your first option isn’t available, this app will give you the next available camp site in the area. Here is where you can have an idea how your daily miles/elevation gain will play out based off availability and the itinerary you are building. Though it doesn’t show exact elevation, it does have a map that shows general incline and decline. If you match this with AllTrails/FarOut, you can get a very good idea of what you are signing up for.
After you have built an itinerary, you want to match this with the 3 cache locations. Though you don’t have to camp where you pick up cache, it will take a while to grab food and repack it. So, it’s best to plan these days at shorter miles. I also recommend passing these places towards the end of your day, so you have less weight throughout the day of hiking. If you do this, you can also pack a fancy meal or drink in the cache, since you won’t have to pack it around for multiple days/miles. Ensure most importantly though, that you will be able to pack enough food to make it between cache locations!
If you aren’t as good with technology or are more old school. You can also, use the general aid with snow pact detail on the NPS.gov website. I recommend you at least glance at this if you are planning on going earlier or later in the season. Camping on snow or backpacking through it is no joke.
Cache
Of course, this trail is not without its perks! Welcome to the beloved cache systems. Cache is basically a fancy way of saying food storage. You will leave your food in a five-gallon plastic bucket or a Rubbermaid-like container at each of the 3 cache locations to be picked up along your backpacking trip. The food in each container is to contain only the food that you would need to get you between cache locations. Aka this is how you end up not having to pack 7-10 days worth of food with you. You will take only the food and leave the bucket behind for future backpackers.
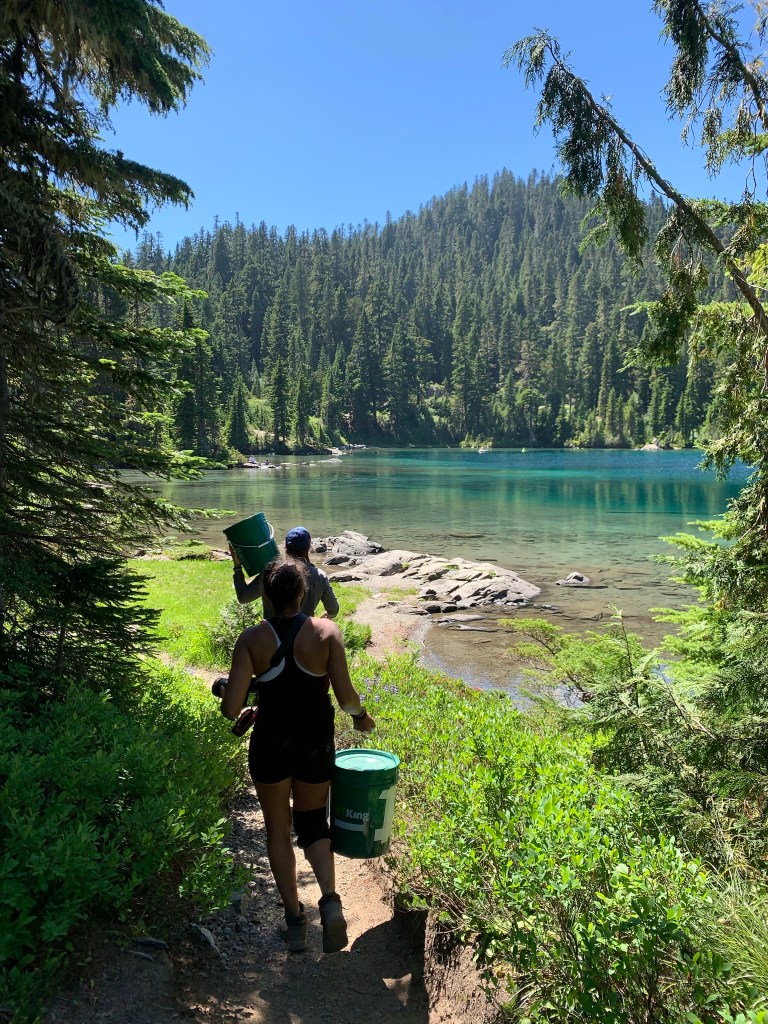
Rangers will not courier food cache from one location to another. So you will either need to mail (via UPS or FED EX) your cache to each location at least 2 weeks prior to the start of your trip or hand deliver prior to starting your trip.
The drop off locations are:
- Longmire wilderness information center
- White river campground
- Mowich Lake (to be dropped off at carbon river ranger station and taken to Mowich lake by the rangers)
Note that you must drop off and pick up at Longmire between 0730-1700. This is one of the reasons most people tend to start their journey here. Also, keep in mind that Mowich Lake’s cache location will open up later due to snow. White river and carbon river are both self-drop off locations. Finally, make sure you triple check the information on your outer label and place a protective clear duct tape coating over it. It is not common for caches to be misplaced or stolen; however, it does happen. So, do your best to triple check your work in order to avoid this. If for some reason your cache isn’t there when you arrive from your hike, there is an area donated food at most cache locations. Not something to rely on, because it could be only granola bars, but a good back-up if in a pinch. You will also be near/in civilization, so begging for a ride to the grocery store is always an option too.
Packing
Packing for a trip this extensive can be very difficult. So, I am going to go over some huge musts for this journey.
First, there are bears in the backcountry. This means that you will need either a bear bin or bear bag for your food to be stored in overnight. Luckily the trail is equipped with bear poles at each camping site. This allows you to hang your dry bag of food from the pole, which is unreachable to bears or other various critters. I highly recommend this option due to the size and weight of a bear bin. Having to carry that weight with you is unreasonable for such a long trip. Though it is recommended to bring bear spray with you, I’d say one to two per group is more than enough.
Second, the biggest mistake you can make is not bringing an adequate water filtration system. You should not have to carry more than a liter of water with you at any given time. This is vital if you wish to keep weight down. Using the app FarOut, you can map the exact location to your next water source, so you can ensure you will have enough between sources. You can also locate water sources near camp, so that you don’t pack in water you don’t need for dinner. In terms of water filtration systems, I can’t recommend the BeFree water filtration more. This is easy to use and allows you to fill up either your bladder, cooking pot, plastic bottle, or so forth with ease. If you are more set on using a bladder for your adventures, then I recommend buying a Sawyer water filtration system. You can cut the straw of your bladder and place the Sawyer directly between the cut straw pieces. This will filter your water out as you drink it. The only downside of this, is the water that come directly from the bladder, not the straw, will not be filtered. So, it can take longer for you to get water for cooking, unless you can boil it.
Third, let’s talk clothes. Now, make sure that you check the weather report before you start your adventure. Though I recommend you bring a warm layer, such as long pants and a down coat, I wouldn’t necessarily say you need to go all out if it’s late July. I cannot express how hot we were, even at night, to the point that we were sleeping outside of our sleeping bags. However, I can recommend that you bring a raincoat and rain pants. This is not only in case it was to rain, but more importantly for the mosquitoes. If you thought you’ve dealt with bad mosquitoes, you haven’t seen anything yet. The minute you get out of your car to start the journey, bring out the Deet with intention! Then if you choose to sit and relax at any point during the hike, odds are you will start getting eaten alive. So, I recommend putting on the rain gear/bug nets immediately to ensure that they can’t reach your skin. I also, recommend bring a bug net for your head. Eventually you just get used to it, but I can’t express how miserable you will be to start out, or without proper gear. Finally, don’t over pack clothes! Remember extra clothes are luxury items. You will be able to wash most clothes in lakes along the way, so only bring what you need. I consider one pair of underwear and socks per day my luxury items. However, I only brought one full change of clothes otherwise. For an 8-day trip, I packed the following:
Top Layers
Raincoat
Down jacket
Patagonia fleece (or a second down jacket)
Bottom Layers
1 pair of Rain pants
1 long pair of yoga pants (or hiking pants)
1 pair of long thick socks (to sleep in)
If going during colder times of the year, would recommend a base layer (top and bottom)
Hiking Clothes
2 tank tops
1 pair of shorts
Miscellaneous Clothes
2 pairs of hiking socks
8 pairs of underwear
1 swimsuit (or bring full coverage underwear to wear instead of a swimsuit)
***This included the clothes I wore to start

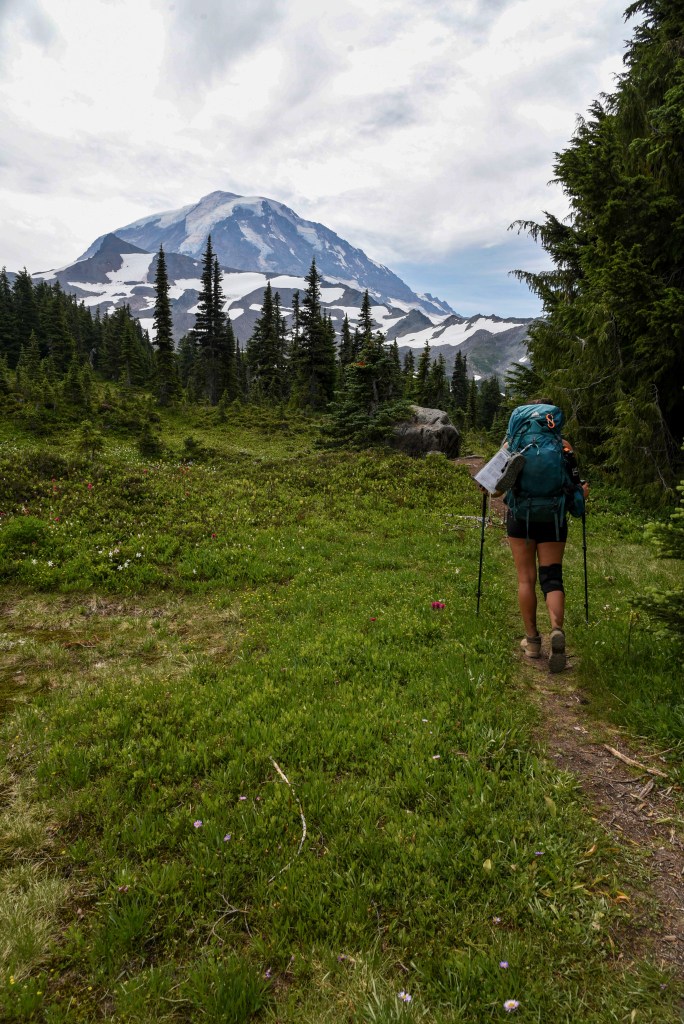
Day Hikes
Lastly, you will want to consider day hikes to include along your route. The amount of day hikes you will be able to complete will be totally dependent on the number of miles per day you have to cover and how you are feeling throughout the trek. Also, keep in mind that there are many short side trails that will lead to beautiful lookouts, especially if on spray park trail. Remember to leave time to go to the sunrise day lodge for snacks and beverages if it is open!!
Fremont Lookout
For a sunrise hike, start from Sunrise Camp. Alternatively, you could head this way for sunset before heading to Sunrise Camp for the night.
Tolmie Peak Lookout
For a sunrise/sunset hike, start from Mowich Lake.
Burroughs Mountain
For a sunrise hike, start from Sunrise Camp. Alternatively, you could head this way for sunset before heading to Sunrise Camp for the night.
Spray Park
This is an alternate trail to the northwest portion of the wonderland trail. This trail comes highly recommended for not only its views, but also your likeability to see a bear/other wildlife. If you had 2 days at Mowich, this would be an excellent way to spend your day. However, keep in mind that you are adding quite a few extra miles. And if you wish to do the loop, you will end up seeing part of the trail twice. Therefore, I recommend just spending a day doing one part of the trail as a there and back and hitting the other side of the trail when you continue your backpacking journey.
